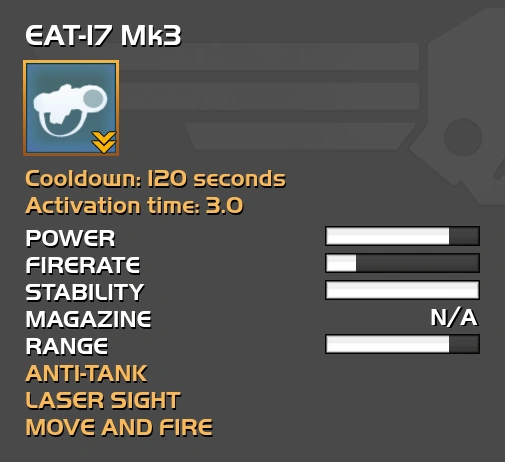

"Calls down two EAT-17 expendable anti-tank weapons. The EAT is a one-use rocket capable of damaging heavily armored targets."
- Armory Description
Stratagem Code
Players must enter the following sequence, using the controller d‑pad, in order to call down this Stratagem during a mission:
![]()
![]()
![]()
![]()
![]()
Unlock Requirement
The EAT-17 is granted to the player as a reward for completing all the missions on its associated planet (typically a medium-low level planet - difficulty 4 to 6).
Upgrades
| Upgrade | Cost | Effect | |
|---|---|---|---|
| Mk1 | Basic variant, no upgrades. | ||
| Mk2 | Improved with lightweight materials, this allows the user to move while aiming. | ||
| Mk3 | Adds a laser sight, allowing for easier aim while moving. This upgrade requires the RL-112 Recoilless Rifle Mk2. | ||
Weapon Stats
- A single EAT-17 can be carried at a time. It will be discarded after firing. Picking up another EAT-17 will swap the one you are currently holding for the one on the ground.
| EAT-17 Detailed Analysis | |||
|---|---|---|---|
| Weapon Info | Additional Notes | ||
| Unlock Rank | Difficulty 4-6 planet | ||
| Weapon Type | Secondary | ||
| Weapon Category | Expendable anti-tank weapon | ||
| Fire Mode | Disposable | ||
| Damage | |||
| Base | Upgraded | Additional Notes | |
| Damage | 2800 | 2800 | |
| Center Mass Damage | 3200 | 3200 | |
| Anti-Personnel Explosive Damage | 150 | 150 | |
| Anti-Personnel Explosion Radius | 2.0 m | 2.0 m | |
| Direct Explosive Damage | 0 | 0 | |
| Direct Explosion Radius | 0.0 m | 0.0 m | |
| Status Effect | None | None | |
| AP Ammo Armor Reduction | 0 | 0 | |
| Statistics | |||
| Base | Upgraded | Additional Notes | |
| Cyclic Rate of Fire (RPM) | 60 | 60 | Theoretical maximum RoF; does not take into account picking up new EATs |
| Capacity | 1 | 1 | Each Hellpod delivers 2 EAT-17s |
| Reload Speed | N/A | N/A | Single-use weapon |
| Spread | todo | todo | |
| Bullet Spread Simulation | todo | ||
Gameplay Tips
- The EAT-17 is a more portable and expendable anti-tank solution than the bulky RL-112 Recoilless Rifle and fulfills the same role with some key differences. While it is less damaging than its bigger brother, it is still equally effective at dispatching armored enemies with good aim and carries a far lesser risk of leaving the team defenseless should its user die in combat or fall into an environmental hazard. Compared to the Recoilless Rifle, the EAT-17 has a smaller explosive radius and can be safely fired in relatively close proximity to the target. It also lacks the lengthy reloads of the Recoilless Rifle and MLS-4X Commando; long as there are EAT-17's nearby, they can be fired as quickly as they can be picked up and aimed.
- The EAT-17 can destroy heavier armored enemies such as Cyborg Warlords and IFVs in a single shot if the rocket connects at the right angle. As the impact angle is far less forgiving than the Recoilless Rifle due to its relatively lower damage, the Mk 3 laser sight upgrade is essential to ensure a solid hit.
- The EAT can be used to reliably immobilize Cyborg IFVs without destroying them. This can be used in a wide variety of situations, such as to stop them from disgorging groups of Grotesques or bulldozing an objective. Immobilizing an IFV that is not a direct threat to the current mission objective is often a better choice than outright destroying it as a new IFV will spawn in the same position or much closer more often than not.
- Heavy enemies such as Warlords that survive an EAT-17 shot can usually be finished off by a few hits from a high damage weapon such as the P-6 Gunslinger, RX-1 Rail Gun, or M2016 Constitution. The Gunslinger is capable of putting out the highest DPS in the shortest amount of time and is the best suited for the finishing blow. Laser weapons with continuous beams such as the LAS-5 Scythe, or LAS-98 Laser Cannon can also finish off wounded Warlords if the beam is centered on the target. Incendiary weapons and the AC-3 Arc Thrower and AC-5 Arc Shotgun when fully charged will also suffice in a pinch.
- The EAT-17's Hellpod can be used as an improvised anti-tank weapon thanks to its ability to be called down an unlimited number of times. A well-timed drop can obliterate multiple heavy units at once and bringing multiples of this Stratagem greatly enhances its offensive and defensive power.
- While it is possible to have the EAT-17's Hellpod land on an AA Gun or Illuminate Beacon and crush it, this is an incredibly difficult and inconsistent method of destroying them.
- The EAT-17 has some benefits and disadvantages when chosen over the REC-6 Demolisher. Helldivers should consider the following when deciding on which to bring on a mission:
- Only two EAT-17's will be supplied per calldown and only one can be carried at a time compared to the 5 charges provided by a single REC-6 calldown.
- The EAT-17 has a shorter cooldown duration of 120 seconds vs the Demolisher's 180 second cooldown.
- EAT-17's will never disappear after a few minutes unlike the Demolisher. EAT-17's will still disappear however if they are not picked up from the Hellpod they came in.
- A single use of the EAT-17 Stratagem can be shared between two players unlike the Demolisher.
- The EAT-17 can reliably immobilize IFVs if necessary and are much faster to use. The Demolisher needs to be thrown first and the travel time makes quickly reacting to threats much more difficult.
- The EAT-17's projectile appears to have travel time but is treated as a hitscan. There is no need to lead shots as the missile will immediately hit exactly where it is aimed.
Gallery
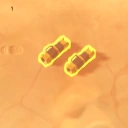
EAT-17
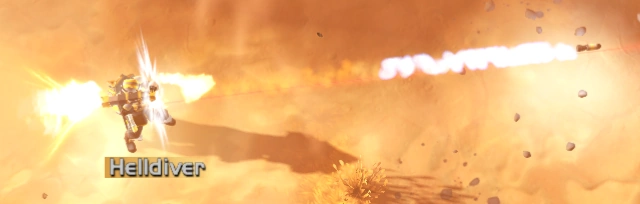
Helldiver launching one-use EAT-17
Notes
- The EAT-17 was re-balanced in Patch 3.02. The weapon is now capable of taking out all lower tier armored enemies in a single shot.
| Weapons | ||||||||
|---|---|---|---|---|---|---|---|---|
| Sidearms | Assault rifles | LMGs | Shotguns | SMGs | Precision | Explosive | Laser tech | Arc tech |
| P-2 Peacemaker | AR-19 Liberator | MG-105 Stalwart♦ | SG-225 Breaker | SMG-45 Defender | LHO-63 Camper♦ | CR-9 Suppressor♦ | LAS-5 Scythe | AC-3 Arc Thrower |
| P-6 Gunslinger♦ | AR-22C Patriot | SG-8 Punisher | MP-98 Knight SMG | RX-1 Rail Gun | PLAS-1 Scorcher♦ | LAS-16 Sickle♦ | AC-5 Arc Shotgun♦ | |
| FLAM-24 Pyro♦ | AR-20L Justice | DBS-2 Double Freedom | SMG-34 Ninja♦ | M2016 Constitution | LAS-12 Tanto♦ | |||
| PLAS-3 Singe♦ | AR-14D Paragon♦ | LAS-13 Trident | ||||||
| Heavy Weapons | ||||||||
|
MG-94 Machine Gun – MGX-42 Machine Gun – AC-22 Dum-Dum♦ – LAS-98 Laser Cannon – FLAM-40 Incinerator – TOX-13 Avenger♦ Obliterator Grenade Launcher – MLS-4X Commando♦ – RL-112 Recoilless Rifle – EAT-17 – REC-6 Demolisher♦ – M-25 Rumbler♦ | ||||||||